I have been doing a lot of research on sick plants and also helping out others a lot on sick plants!
Most of the stuff I have learned is from others and keeping up to date on there problems they are having. Some I have learned on my own, the sick plant troubles I have had was pH troubles! I didn’t really think the importance of how pH plays a role with your plants being healthy or dead.##CONTINUE##
I honestly think one of the most important parts of your growing is having a good solid pH tester, a digital one is the best to have. There are other ones you can buy as well, liquid pH test kits are inexpensive and get the job done if you can't afford a digital pH meter, STAY AWAY FROM SOIL TESTERS, they don't do the job and are not very accurate at all. pH test strips work well, even if you are on a budget! So if you rely on a soil tester and its tell you your soil is 7 and your having problems, 9 times out of 10 it's going to be your water pH that is messing up the soil pH check the water you are using. Unless you are using additives in your soil mixture like blood bone meal, and Peat moss those will throw your pH off too.
Adding nutrients to your water can cause the pH to get low as well, so its best to test your pH of your water before and after you add your nutrients. Nutrient deficiency are mostly caused by human mistakes,along with to much or to little of the amount of nutrients available. The best range for nutrients to be absorbed is between a pH of 5 and 7 and a (TDS) range of 800 to 3000 PPM.
Having these conditions will help making nutrient deficiency a lot easier to overcome.
Well this guide I am making on sick plants is going to be very detail in helping out as many as possible… I have collected a lot of accurate data and have been putting it together piece by piece… Stuff on what kinda of nutrients can lead to locking out other nutrients as well…
I will be updating this until it gets done, because I have a lot of information but just not on every sick problem that is out there…
Mobile Elements are mostly going to affect the older leaves first then work its way to other leaves and then the nutrients will be taken from old leaves to newer growths…
The following are mobile elements and as well macro nutrients.
First off, we are going to start out with Nitrogen.
Nitrogen (N) Mobile Element and Macro Element
Benefit: Nitrogen plays a very big role in your plants; this one element is directly responsible for production of chlorophyll, photosynthesis, Amino Acids, which are the building block of Proteins. The myriad of enzymes which help the plants growth in leaves stems and the how well the vigor of your plants is.
Nitrogen is the biggest mobile element meaning it can travel anywhere on the plant.
Usually the def will start on the lower to middle part of the plant, and then will usually happen to older leaves first. Then the deficiency will work its way up the plant. Your plant can be green on top, then yellowing on the lower leaves when the deficiency is starting out. Yield will be greatly reduced without good amounts of nitrogen in your plants. Sometimes in bad cases the leaves will turn a purplish color along with the yellowing.
Unlike a magnesium deficiency, nitrogen def will start from the tips and work its way back to the leaf node. Nitrogen and Magnesium get confused. The best way to tell them apart is, nitrogen deficiency starts around the tips and works its way to the back of the leaves, where a magnesium deficiency will cover the entire outer part of the leave and make the entire leaves yellow leaving the veins to stay green. If your plants are having a slow growth rate and have yellowing of the leaves, then most likely it’s a nitrogen deficiency.
Towards the end of flowering stages, the plant will show a nitrogen deficiency almost always. Reason to this is, because the plant is using all its stored nutrients in the leaves and dropping the leaves it doesn’t need anymore due to them being the oldest leaves.
So don’t freak out when your plant starts to yellow a bit in late stages of flowering .
Parts affected by a nitrogen deficiency are: Older foliage, going to whole plant, Petioles (rare) cases.
Now for having too much nitrogen in your growing mediums or soil. The plant will have like an overall DARK green look and have delayed maturity. Due to Nitrogen being involved in vegetative growth, to much nitrogen will result in tall plants with weak stems. New growth will be very lively and plant transpiration will be high, but not always. Nitrogen toxicity can be seen when there are very very dry conditions almost as if there was a drought, which may show a burning effect. If you give your plants ammonium based nutrients they may show NH4+ toxicity, which will show a smaller plant growth and lesions that occur on stems and roots, leaf margins that will roll downward. Also the big fan leaves will have “the claw” look. The tips will point down but the leaves will stay up as if when you bend your fingers downwards. Leaves can be twisted when growing… mainly new growths. Roots will be under developed along with the slowing of flowering. Yields will be decreased, because to much nitrogen in early stages of flowering slows down bud growth. Water uptake is slowing down from the vascular breakdown of the plants as well. Too much potassium and nitrogen will lock out calcium as well.
Problems with Nitrogen being locked out by pH troubles.Waterlogged soil and Soil with low organic matter.
Nitrogen is a very important element in the plant, all of them are but some are more important than others. For soil the best pH to have is 6.8. Why? Because at 6.8, that’s the best number for ALL available nutrients to be absorbed into the plant without any of them being locked out. For hydro and soil less mediums best pH to have is around 5.8.
Try not to keep your plants to cold, because the cold temps will cause the nitrogen harder for the plant to be absorbed.
pH levels for Nitrogen
Soil levelsNitrogen gets locked out of soil growing at pH levels of 4.0- 5.5.
Nitrogen is absorbed best in soil at a pH level of 6.0-8.0. (wouldn’t recommend having a pH of over 7.0 in soil) best range to have nitrogen is a pH of 6-7. Anything out of that range will contribute to a nitrogen def.
Hydro and Soil less MediumsNitrogen gets locked out of Hydro, Soil less mediums at the levels of 4.5-5.0.
Nitrogen has the best absorption rate at a pH of 5.5 to 8.0
(Wouldn’t recommend having a pH over 6.5 in hydro and soil less mediums.) Best range to have Nitrogen is: 5.0-7.0. Anything out of that range will contribute to a nitrogen def.
Solution to fixing a Nitrogen deficiencyAvoid excessive ammonium nitrogen, which can interfere with other nutrients. Too much N delays flowering. Plants should be allowed to become N-deficient late in flowering for best flavor.
A goof solid N-P-K ratio will fix any nitrogen deficiency. Any chemical or organic fertilizers that have Nitrogen in them will fix a nitrogen deficiency., Peters all purpose plant food 20-20-20 is good, Miracle grow All purpose plant food, Miracle grow Tomato plant food, (Only mixing at ½ strength when using chemical nutrients, or it will cause nutrient burn!) as well and blood meal! If you need to give your plants a quick solution to nitrogen and you want to use blood meal, I suggest making it into a tea for faster use, where blood meal is slow acting, but when made into a tea it works quicker! Other sources of nitrogen are dried blood, Cotton seed meal which is slow acting, Insect eating bat guano which is fast acting. Bone meal which is a gradual absorption when not made into a tea.(also excellent source of phosphorus). Fish Meal Or Fish Emulsion is a good source of nitrogen and is medium acting. Worm castings, which is gradual absorption. Seabird guano, All purpose Millennia Seabird guano, Orginal Seabird guano All Purpose, Crabshell ,which is slow absorption. Fox Farm Grow Big, which is fast acting. (can bring down your pH as well)
Here are a list of things that help fix a Nitrogen Deficiency
Chemical NutrientsAdvanced nutrients Grow (2-1-6)
Vita Grow (4-0-0),
BC Grow(1.2-3.2-6.5)
GH Flora Grow (2-1-6)
GH Maxi grow (10-5-14)
GH floraNova grow (7-4-10),
Dyna gro Grow (7-9-5)
Organic NutrientsDr. Hornby's Iguana Juice Grow (3-1-3)
Advanced Nutrients Mother Earth Grow (1.5-.75-1.5)
Earthjuice Grow (2-1-1),
Pure Blend Pro (3-1.5-4)
Bone Meal(0-10-0)
Blood Meal(12-0-0)
Fish Emulsion (5-1-1)
Seabird Guano (11-13-3)
Crab Shells(2.5-3.0-.5)
Pure Blend Grow (0.4-.01-.5)
Marine Cuisine (10-7-7)
MaxiCrop Seaweed (1-0-3)
Super Tea (5-5-1)
Mexican Bat Guano (10-2-0)
Sea Island Jamaican Bat Guano (1-10-0)
Kelp Meal (1-0-2)
Seaweed Plus Iron
Neptune's Harvest (2-4-0.5)
Alaska Start-Up(2-1-2)
Bio-Grow (1.8-0.1-6.6)
Age old Grow (12-6-6)
AGE Old Kelp (.30-.25-.15)
Neptune's Harvest (2-4-1)
Maxicrop Seweed(.1-0-1)
METANATURALS Organic grow (3-3-3)
METANATURALS Organic nitrogen (16-0-0)
So adding anyone of these above should fix up your nitrogen deficiency! Nitrogen deficient plants usually recover in about a week, affected leaves will not recover.
Now if you added to much chemical nutrients and or organics, (which is hard to burn your plants when using organics) you need to flush the soil with plain water. You need to use 2 times as much water as the size of the pot, for example: If you have a 5 gallon pot and need to flush it, you need to use 10 gallons of water to rinse out the soil good enough to get rid of excessive nutrients. Soluble nitrogen (especially nitrate) is the form that's the most quickly available to the roots, while insoluble N (like urea) first needs to be broken down by microbes in the soil before the roots can absorb it.
Note: Blood Meal, Dried Blood, Guanos, Kelp Meal, Cotton Seed Meal, Peat Moss, Sulfur and fish meal are all acidic and can bring your pH down, so if you add these please monitor your pH when using those.

Note: Bone Meal, Rock Phosphate, Wood Ashes pretty much all ashes, Shellfish Compost and Crab Meal are all alkaline and can make your pH go up, so if you add any of these please monitor your pH.
Here are 3 pictures of what a nitrogen def looks like... the first 2 are ones that where dropped from a late flowering plant.. the 3rd one was the start of one on my vegging plants... and the last picture is one that is caused by TOO MUCH Nitrogen.
(Picture 1 is a Nitrogen Deficiency in vegetative)

(Picture 2 is a Nitrogen Deficiency in late Flowering)

(Picture 3 is Mine)
 Phosphorus (P)
 Mobile Element and Macro Element
Benefit: Phosphorus does a lot of things for the plant. One of the most important parts of Phosphorus is: It aids in root growth and influences the vigor of the plant and is
one of the most important elements in flowering as well helps to germinate seedlings.
Phosphorus is an essential plant nutrient, and since it is needed in large amounts, it is classified as a macronutrient. Phosphorus is a MAJOR important nutrient in the plants reproductive stages. Without this element the plants will have a lot of problems blooming without proper levels of Phosphorus.
When your plants are deficient in phosphorus, this can overall reduce the size of your plants. Not enough causes slow growth and causes the plant to become weak, to little amount of Phosphorus causes slow growths in leaves that may or may not drop off. The edges all around the leaves or half of the leaves can be brownish and work its way inwards a bit causing the part of the leaves to curl up in the air a bit. Fan leaves will show dark greenish/purplish and yellowish tones along with a dullish blue color to them. Sometimes the stems can be red, along with red petioles that can happen when having a Phosphorus deficiency. This isn’t a sure sure sign of you having one though, but can be a sign. Some strains just show the red petioles and stems from its genes.
So pretty much the overall dark green color with a purple, red, or blue tint to the fan leaves is a good sign of a Phosphorus deficiency. Having Cold weather (below 50F/10C) can make phosphorous absorption very troublesome for plants.
Many people get a Phosphorus deficiency confused with a fungus problem because the ends of the leaves look like a fungus problem, But the damage occurs at the end of the leaves. side of the leaves and has a glass like feeling to it as if it had a pH problem. Parts affected by a phosphorus deficiency are: Older Leaves, Whole plant, Petioles.
Too much Phosphorus levels affect plant growth by suppressing the uptake of: Iron, potassium and Zinc, potentially causing deficiency symptoms of these nutrients to occur def in plants. A Zinc deficiency is most common under excessive phosphorus conditions,
As well as causing other nutrients to have absorption troubles like zinc and copper. Phosphorus fluctuates when concentrated and combined with calcium
Problems with Phosphorus being locked out by pH troublesCold wet soils, acid or very alkaline soils, compacted soil.
SoilPhosphorus gets locked out of soil growing at pH levels of 4.0-5.5
Phosphorus is absorbed best in soil at a pH level of 6.0-7.5 (wouldn’t recommend having a pH of over 7.0 in soil) Anything out of the ranges listed will contribute to a Phosphorus deficiency.
Hydro and Soil less MediumsPhosphorus gets locked out of Hydro and Soil less Mediums at pH levels of 6.0-8.5.
Phosphorus is absorbed best in Hydro and Soil less Mediums at pH levels of 4.0- 5.8. (Wouldn’t recommend having a pH over 6.5 in hydro and soil less mediums.) Best range for hydro and soil less mediums is 5.0 to 6.0. Anything out of the ranges listed will contribute to a Phosphorus Deficiency.
Solution to fixing a Phosphorus deficiencySome deficiency during flowering is normal, but too much shouldn't be tolerated. Any chemical or organic fertilizers that have Phosphorus in them will fix a Phosphorus deficiency. If you have a phosphorus deficiency you should use any N-P-K ratio that is over 5.Again Peters all purpose 20-20-20 is a good mix. Miracle grow Tomato plant food, Miracle grow All purpose plant food (Only mixing at ½ strength when using chemical nutrients, or it will cause nutrient burn!) Other forms of phosphorus supplements are: Bone meal, which is gradual absorption, I suggest making it into a tea for faster use, where bone/blood meal is slow acting, but when made into a tea it works quicker! Fruit eating bat guano, which is fast absorption, Worm castings, which is gradual absorption, Fish meal, which is medium absorption, Soft Rock Phosphate, which is medium absorption, Jamaican or Indonesian Guano, which is fast absorption. Crabshell, which is slow absorption. Tiger Bloom , which is fast absorption.
Here is a list of things to help fix a Phosphrus Deficiency.
ChemicalAdvanced nutrients Bloom (0-5-4)
Vita Bloom (0-7-5)
BC Bloom (1.1-4.4-7)
GH Flora Bloom (0-5-4)
GH Maxi Bloom (5-15-14)
GH Flora Nova Bloom (4-8-7)
Dyna-Gro Bloom (3-12-6)
Fox Farm Tiger Bloom (2-8-4)
Awsome Blossums
OrganicDr. Hornby's Iguana Juice Bloom (4-3-6)
Advanced Nutrients Mother Earth Bloom (.5-1.5-2)
Fox Farm Big Bloom (.01-.3-.7)
Earth Juice Bloom (0-3-1)
Pure Blend Bloom (2.5-2-5)
Pure Blend Pro Bloom (2.5-2-5)
Buddswell (0-7-0)
Sea Island Jamaican Bat Guano (1-10-0)
Indonesian Bat Guano (0-13-0)
Rainbow Mix Bloom (1-9-2)
Earth Juice Bloom (0-3-1)
BIO BLOOM (2-6-3.5)
AGE OLD BLOOM (5-10-5)
ALASKA MORBLOOM (0-10-10)
METANATURALS ORGANIC BLOOM (1-5-5)
Any of these will cure your phosphorus deficiency. Affected leaves will not show recovery but new growth will appear normal.
Now if you added to much chemical fertilizers and or organics,( which is hard to burn your plants when using organics) You need to Flush the soil with plain water. You need to use 2 times as much water as the size of the pot, for example: If you have a 5 gallon pot and need to flush it, you need to use 10 gallons of water to rinse out the soil good enough to get rid of excessive nutrients.
Note: Blood Meal, Dried Blood, Guanos, Kelp Meal, Cotton Seed Meal, Peat Moss,
Sulfur and fish meal are all acidic and can bring your pH down, so if you add these please monitor your pH when using those.

Note: Bone Meal, Rock Phosphate, Wood Ashes pretty much all ashes, Shellfish Compost and Crab Meal are all alkaline and can make your pH go up, so if you add any of these please monitor your pH.
Picture 1 is a Phosphorus deficiency during vegetative growth.

Picture 2 is what a phosphorus deficiency looks like in flowering.
 Potassium (K)
 Mobile Element and Macro Element
Potassium plays a big role as well. Having good amounts of potassium in your plants helps in having sturdy and thick stems, disease-resistance, water respiration, as well aids in photosynthesis. Potassium is also found in the whole plant. It is necessary for all activities having to do with water transportation. Potassium is necessary for all stages of growth, especially important in the development of Buds.
Having to little of Potassium in your plants causes the plants leaves to show retarded growth and show a scorched tip and edges around the leaves. Plants may stretch and your branches can be easily broken or weak. Don’t get this deficiency confused with iron, because it almost acts like iron but to tell the difference in the two is: for potassium the tips of the leaves curl and the edges burn and die. Older leaves may show a red color and leaves could curl upwards. Dead patches (Necrosis) can happen on the margins of larger fan leaves thus, the leaves will eventually die off and turn brown. The Older leaves will show different patches of color (mottle) and turn yellow between the veins, following by whole leaves that turn dark yellow and die. The plants overall growth slows down, mostly when they are in vegetative stage. To little amount of potassium also slows the growth of buds during flowering stages. Dark edges will appear around the edges of the leaf when the deficiency is starting to happen. When your Relative humidity is low, you can almost bet your going to soon get a potassium deficiency from your plants perspiration.
Potassium can get poorly absorbed when having too much Calcium or ammonium nitrogen, and maybe cold weather. Having to much sodium (Na) causes potassium to be displaced. SO keep those in mind… Parts affected by a Potassium Deficiency are: older leaves and leaf margins.
When you have too much Potassium in your soil, it can lead to big troubles, like salt damage and acid fixation of the root system, as well as too much potassium can cause a calcium deficiency. Your fan leaves will show like a light to a dark yellow to whitish color in between the veins. Due to a molecular imbalance, potassium toxicity can cause a reduced uptake and lead to the deficiencies of Mg, and in some cases, Ca. Also leads to the other nutrients to not be absorbed properly leading to lots of other deficiency such as: magnesium, manganese, zinc and iron and can cause problems with calcium as well.
Problems with Potassium being locked out by pH troublesSoils with excessive Leeching and High pH soils and or water.Soils that are potassium fixated. An excess of kitchen salts (sodium) in the root system/environment.
SoilPotassium gets locked out of soil growing at pH levels of 4.0-5.5
Potassium is absorbed best in soil at a pH level of 6.0-9.5. (Wouldn’t recommend having a pH of over 7.0 in soil) anything out of the ranges listed will contribute to a Potassium deficiency.
Hydro and Soil less MediumsPotassium gets locked out of Hydro and Soil less Mediums at pH levels of 4.0-4.5, 6.0-6.5.
Potassium is absorbed best in Hydro and Soil less Mediums at pH levels of 4.7-5.3, 6.7-8.5. (Wouldn’t recommend having a pH over 6.5 in hydro and soil less mediums.) Best range for hydro and soil less mediums is 5.0 to 6.0. Anything out of the ranges listed will contribute to a potassium deficiency.
Solution to fixing a Potassium deficiencyAny Chemical/Organic nutrients that have potassium in them will fix a potassium deficiency. Again Peters All Purpose plant food 20-20-20, will cure the potassium deficiency , Miracle grow Tomato plant food, Miracle grow All purpose plant food. (Only mixing at ½ strength when using chemical nutrients, or it will cause nutrient burn!) Some other supplements of potassium are: Wood ashes, which are fast absorption, Kelp Meal, which is medium absorption, Greensand, which is slow absorption, granite dust, which is slow absorption. Sulfate of Potash, Sulfate of Potash Magnesia, Muriate of Potash, which are medium absorption. FOXFARM GROW BIG HYDROPONIC CONCENTRATE, which is fast absorption. (FFGB can bring your pH down as well) Earth Juice Meta-K, which is fast acting. (Can bring down your pH as well) Leaves will never recover, but the plant will show recovery after about 4 to 5 days when using a fast acting nutrient.
Note: Wood Ashes, can make your pH go up a bit, so please monitor your pH when using it.Now if you added too much chemical nutrients and or organics, (which is hard to burn your plants when using organics) you need to flush the soil with plain water. You need to use 2 times as much water as the size of the pot, for example: If you have a 5 gallon pot and need to flush it, you need to use 10 gallons of water to rinse out the soil good enough to get rid of excessive nutrients.
Picture 1 and 2 shows a Potassium deficiency

 Magnesium (Mg)
 - Micronutrient and Mobile Element
Magnesium helps supports healthy veins while keeping a healthy leaf production and its structure. Magnesium is significant for chlorophyll-production and enzyme break downs. Magnesium which must be present in relatively large quantities for the plant to survive, but yet not to much to where it will cause the plant to show a toxicity.
Magnesium is one of the easiest deficiencies to tell… the green veins along with the yellowness of the entire surrounding leave is a dead giveaway, but sometimes that’s not always the case here. In case you have one of those where it doesn’t show the green veins, sometimes leaf tips and edges may discolor and curl upward. The growing tips can turn lime green when the deficiency progresses to the top of the plant. The edges will feel like dry and crispy and usually affects the lower leaves in younger plants, then will affect the middle to upper half when it gets older, but It can also happen on older leaves as well. The deficiency will start at the tip then will take over the entire outer left and right sides of the leaves. The inner part will be yellow and or brownish in color, followed by leaves falling without withering. The tips can also twist and turn as well as curving upwards as if you curl your tongues.
Excessive levels of magnesium in your plants will exhibit a buildup of toxic salts that will kill the leaves and lock out other nutrients like Calcium (Ca). Mg can get locked out by having too much Calcium, Chlorine or ammonium in your soil/water.
One of the worst problems a person can have is a magnesium def caused by a pH lockout. By giving it more magnesium to cure the problem when you are thinking you are doing good, but actually you are doing more harm then good. When the plants can’t take in a nutrient because of the pH being off for that element, the plant will not absorb it but it will be in the soil… therefore causing a buildup. A buildup will be noticed by the outer parts of the plant becoming whitish and or a yellowish color. The tips and part way in on the inner leaves will die and feel like glass. Parts affected by Magnesium deficiency are: space between the veins (Interveinal) of older leaves; may begin around interior perimeter of leaf.
Problems with Magnesium being locked out by pH troubles Light Acid Soils, soils with excessive potassium, calcium and or phosphorus
SoilMagnesium gets locked out of soil growing at pH levels of 2.0-6.4
Magnesium is absorbed best in soil at a pH level of 6.5-9.1 . (Wouldn’t recommend having a pH of over 7.0 in soil) anything out of the ranges listed will contribute to a Magnesium deficiency.
Hydro and Soil less Mediums Magnesium gets locked out of Hydro and Soil less Mediums at pH levels of 2.0-5.7
Magnesium is absorbed best in Hydro and Soil less Mediums at pH levels of 5.8-9.1
(Wouldn’t recommend having a pH over 6.5 in hydro and soil less mediums.) Best range for hydro and soil less mediums is 5.0 to 6.0. Anything out of the ranges listed will contribute to a Magnesium deficiency.
Solution to fixing a Magnesium deficiencyAny Chemical/Organic nutrients that have Magnesium in them will fix a Magnesium deficiency. (Only mixing at ½ strength when using chemical nutrients or it will cause nutrient burn!)
Other nutrients that have magnesium in them are: Epsom salts, which is fast absorption. Dolomite lime and or garden lime (same thing just called different) which is slow absorption. Sulfate of Potash, Magnesia which is medium absorption. Worm Castings, which is slow absorption. Crabshell which is slow absorption. Earth Juice Mircoblast, which is fast acting. (a must buy!! Has lots of 2ndary nutrients).
Now if you added to much chemical nutrients and or organics,( which is hard to burn your plants when using organics) You need to Flush the soil with plain water. You need to use 2 times as much water as the size of the pot, for example: If you have a 5 gallon pot and need to flush it, you need to use 10 gallons of water to rinse out the soil good enough to get rid of excessive nutrients.
Picture one shows a mid grade magnesium deficiency.
 Calcium (Ca)
 -Macro Nutrient and an Immobile element.
Calcium is another important element that helps the plants cell walls, cell division in making the plants stems, stalks, branches stronger, as well as contributing to root growth, mostly the newer root hairs, Calcium also helps enhancing the uptake of K in the the plants roots. Calcium moves really slow within the plant and tends to concentrate in roots and older growth.
When plants exhibit a Calcium deficiency the younger leaves are the first to show it as well as older leaves. The Leaf tips will die back, the tips may curl, and growth of the plant is stunted. The plant can show a weakness in the stems and branches, as well as a under developed root system that can lead to bacteria problems with roots dieing off. Having slow plant transpiration rates can aggravate the uptake of calcium. Make sure your soil isn’t very acidic, for calcium gets harder to be absorbed through acidic soils, Which leads to having a plant that is deficient in Calcium. The leaf tips, edges and new growth will or may turn a yellow/brown color that happen in spots and often surrounded by a sharp brown outlined edge and then the leaf tips die back. If too much calcium is given at an early stage of growth it can stunt the growth of your plants. Having to much of calcium will also flocculate when a concentrated form is combined with potassium. The parts affected by a calcium deficiency are the roots. Stem or petiole, young or old leaves.
Too much Calcium will lead to other micronutrient deficiencies. Calcium fixation is caused by many types of mediums such as: clay soils, unbuffered coco and humus. The lime tends to bond to these soils very easily. The stems of the plant will not be able to hold the plant up and will exhibit a white brown in between the veins of the leaves when having too much calcium. Also having to much potassium and or nitrogen will cause a calcium lockout.
Problems with Calcium being locked out by pH troubles Improper watering, (most common cause), very acidic soils with excessive potassium, excessively dry and or wet soil. Lack of calcium in the soil results in the soil becoming too acid. This leads to Mg or Fe deficiency or very slow stunted growth
SoilCalcium gets locked out of soil growing at pH levels of 2.0- 6.4
Calcium is absorbed best in soil at a pH level of 6.5-9.1 (Wouldn’t recommend having a pH of over 7.0 in soil) anything out of the ranges listed will contribute to a
Calcium Deficiency.
Hydro and Soil less Mediums Calcium gets locked out of Hydro and Soil less Mediums at pH levels of 2.0- 5.3
Calcium is absorbed best in Hydro and Soil less Mediums at pH levels of 5.4-5.8 (Wouldn’t recommend having a pH over 6.5 in hydro and soil less mediums.) Best range for hydro and soil less mediums is 5.0 to 6.0. Anything out of the ranges listed will contribute to a Calcium Deficiency.
Solution to fixing a Calcium deficiencyTo fix a calcium deficiency you can treat by foliar feeding with one teaspoon of dolomite lime or Garden lime per quart of water, Or Any Chemical/Organic nutrients that have Calcium in them will fix a Calcium deficiency. (Only mixing at ½ strength when using chemical nutrients or it will cause nutrient burn!)
Or you can take crushed up dolomite lime or garden lime in a gallon of water and water it in the soil. 1 to 2 teaspoons per gallon of water, which will be slow acting. Garden Gypsum, which is medium absorption. Limestone, which is medium absorption, Rock Phosphate and Animal wastes which are both medium/slow absorption.
Note: Caution when using gypsum to an already acid soil (pH that is less than 5.5) can have a very bad effect on different types of plants by effecting the absorption of soil aluminum, which is poison to plant roots.Now if you added to much chemical nutrients and or organics, (which is hard to burn your plants when using organics) you need to flush the soil with plain water. You need to use 2 times as much water as the size of the pot, for example: If you have a 5 gallon pot and need to flush it, you need to use 10 gallons of water to rinse out the soil good enough to get rid of excessive nutrients.
Pictures 1-2 shows calcium deficiencies. First one shows late, 2nd one shows early development.

 Zinc (Zn)
 Micro Nutrient and an Immobile element.
Zinc plays a lot of roles in the plants, first off zinc aids in the plants size and maturity as well as production of leaves, stalks, stems and branches. Zinc is an essential component in many enzymes as well as growth hormone auxin .Low auxin levels can be the cause of stunting of the plants leaves and the shoots. Zinc is also important in the formation and activity of chlorophyll. Plants that have a good level of Zinc, can handle long droughts. So that’s why Zinc plants an important role how it absorbs moisture.
Zinc deficiencies on some plants will have the Spotting and bleached spots (chlorosis) between the veins first appears on the older leaves first, and then goes on to the immature leaves. It will then start to slowly affect tips of growing points of the plants. When the zinc deficiency happens so suddenly, the spotting can appear to be the same symptoms to that of an iron and manganese, without the seeing the little leaf symptom.
Zinc is not mobile in plants so the symptoms will occur mainly in the newer growths. Having a plant that is deficiency in Zinc can cause small crops, short shoots and have a cluster of small distorted leaves near the tips. Between the veins (Interveinal) yellowing is often combined with overall paleness. Pale or grayish, yellowing between the veins; rosetted weak is the signs of a Zinc deficiency.
With a low level of zinc in your plants, your yields will be dramatically reduced.
Interveinal chlorosis is present in the small, narrow distorted leaves at the ends of really shortened shoots and the shortening between internodes. Leaf margins are often distorted or wrinkled. These nutrients will get locked out due to high pH: Zinc, Iron, and Manganese. These deficiencies will often occur together. Parts affected by a zinc deficiency are young leaves and petioles.
Having an excess of Zinc is very rare, but when it does happen it can cause wilting and in worse cases death.
Problems with Zinc being locked out by pH troubles High pH, Low organic matter, High Phosphorus levels in the soil, and or lack of nitrogen.
Soil Zinc gets locked out of soil growing at pH levels of 4.5-4.7, 7.5-9.5
Zinc absorbed best in soil at a pH level of 5.0-7.0 (Wouldn’t recommend having a soil pH of over 7.0 in soil) Anything out of the ranges listed will contribute to a Zinc Deficiency.
Hydro and Soil less Mediums Zinc gets locked out of Hydro and Soil less Mediums at pH levels of 5.7-8.5
Zinc is absorbed best in Hydro and Soil less Mediums at pH levels of 4.0-5.5 (Wouldn’t recommend having a pH over 6.5 in hydro and soil less mediums.) Best range for hydro and soil less mediums is 5.0 to 6.0. Anything out of the ranges listed will contribute to a Zinc Deficiency.
Solution to fixing a Zinc deficiencyAny Chemical/Organic nutrients that have potassium in them will fix a Zinc deficiency. (Only mixing at ½ strength when using chemical nutrients or it will cause nutrient burn!)
And any of the following nutrients will fix a zinc deficiency: Zinc sulfate, zinc chelated, or zinc oxides are adequate fertilizer sources for zinc. Or you can bury galvanized nails in the soil. (Make sure you take off the sharp point at the end to prevent roots from being damaged) Garden Manure, which is slow acting. Greensands, Cottonseed Meal are both medium/slow absorption as well.
Now if you added to much chemical nutrients and or organics,( which is hard to burn your plants when using organics) You need to Flush the soil with plain water. You need to use 2 times as much water as the size of the pot, for example: If you have a 5 gallon pot and need to flush it, you need to use 10 gallons of water to rinse out the soil good enough to get rid of excessive nutrients.
Picture 1 is a zinc deficiencies in vegetative growth.
 Iron (Fe)
 Micro Nutrient and an Immobile element
Iron is an important component of the plants enzyme and is also important for the transportation of electrons while photosynthesis is happening...
Iron reacts with many of the components of nutrient solutions, which will cause a nutrient lockup to occur, If you add to much Iron without adding enough Phosphorus, you can contribute to a phosphorus deficiency , so watch out how much iron and phosphorus your nutrients have. The Leaves on the plant can turn a pale yellow along the growing shoots, while the veins remain dark green. When you have pH imbalance, it can make iron insoluble. The tissue between the veins becomes pale or white, kind of mimics the magnesium deficiency, but not yellow, iron has the white where the yellow would be on the magnesium deficiency. The deficiency starts with the lower and middle leaves, while the new leaves become completely lacking in chlorophyll, but with little or no necrotic spots. The chlorotic mottling on new leaves starts first near the bases of the leaflets, so the middle of the leaf appears to have a yellow mark. Iron is difficult for plants to absorb and moves really slowly in the plant.
Harder for outdoor plants to absorb when in hot weather. Parts affected by the Iron Deficiency are: Young leaves and Petioles.
To much Iron can cause a problem that looks like a pH imbalance, Brown spotting on the top leaves, mainly fan leaves. Can affect the whole plant. Iron Toxicity is rare for pH below 5.5.
Problems with Iron being locked out by pH troubles Over watering, pests nematodes, not enough drainage, like not enough perlite. High pH, Soils with low iron, High Phosphorus, Excess Zinc, manganese or copper.
Soil Iron gets locked out of soil growing at pH levels of 2.0-3.5
Iron is absorbed best in soil at a pH level of 4.0-6.5 (Wouldn’t recommend having a soil pH of over 7.0 in soil) anything out of the ranges listed will contribute to an Iron Deficiency.
Hydro and Soil less Mediums Iron gets locked out of Hydro and Soil less Mediums at pH levels of 2.0-3.5
Iron is absorbed best in Hydro and Soil less Mediums at pH levels of 4.0- 6.0 (Wouldn’t recommend having a pH over 6.5 in hydro and soil less mediums.) Best range for hydro and soil less mediums is 5.0 to 6.0. Anything out of the ranges listed will contribute to an iron deficiency.
Solution to fixing a Iron deficiencyAny Chemical/Organic nutrients that have potassium in them will fix a Iron deficiency. (Only mixing at ½ strength when using chemical nutrients, or it will cause nutrient burn!) Foliar feed with chemical fertilizer containing Fe or rusty water can work well. Other supplements that have Iron in them are: Iron chelates, Ferric oxide, Ferrous oxide, Ferrous sulfate, all of these are fast absorption. Greensand, Cottonseed Meal is slow absorption, Garden Manure, which is medium absorption. Manure is most common organic iron source to use.
Now if you added to much chemical nutrients and or organics, (which is hard to burn your plants when using organics) You need to Flush the soil with plain water. You need to use 2 times as much water as the size of the pot, for example: If you have a 5 gallon pot and need to flush it, you need to use 10 gallons of water to rinse out the soil good enough to get rid of excessive nutrients.
Picture 2-3 is a more severe case of iron deficiency.

 Sulfur (S)
 Micro Nutrient and an Immobile element
Sulfur plays an important role in root growth, chlorophyll supply and plant proteins. Just like iron, Sulfur moves slowly in the plant, hotter temps will make Sulfur harder to absorb like iron. But unlike iron, Sulfur is distributed evenly throughout the plant, mainly the big fan leaves. Sulfur is also a very important element in vegetative growth.
First signs of a Sulfur deficiency are pale young leaves. The growth of leaves will remain slow, but the leaves can also get brittle and stay narrower than normal. Can also have small mutated leaves, along with the buds on top of flowering plants will die off. The growth if the plant can be stunted as well as yellowing of the younger leaves and new growth. Unlike a magnesium deficiency where it starts from the leaves tip and around, sulfur starts from the back of the leaves on forward to the middle of the leaves. The Stems become Hard, thin and may be woody. Some of the plants may show orange and red tints rather than yellowing. The stems will increase in length but not in diameter. Leaves will then be stiff and brittle like glass and fall off soon. Parts affected by a Sulfur deficiency are: The whole plant can be affected as well as young leaves, leaf veins.
Too much Sulfur will cause your plants to be small along with the size of your leaves, along with your leaves being brown and dead looking at the tips. An excess of sulfur can also look like salt damage, restricted growth and dark color damage.
Problems with Sulfur being locked out by pH troubles Soil Sulfur gets locked out of soil growing at pH levels of 2.0-5.5
Sulfur is absorbed best in soil at a pH level of 6.0- 9.5 (Wouldn’t recommend having a soil pH of over 7.0 in soil) Anything out of the ranges listed will contribute to a Sulfur Deficiency.
Hydro and Soil less Mediums Sulfur gets locked out of Hydro and Soil less Mediums at pH levels of 2.0-5.5
Sulfur is absorbed best in Hydro and Soil less Mediums at pH levels of 6.0- 9.5 (Wouldn’t recommend having a pH over 6.5 in hydro and soil less mediums.) Best range for hydro and soil less mediums is 5.0 to 6.0. Anything out of the ranges listed will contribute to an Sulfur deficiency.
Solution to fixing a Sulfur deficiencyMix 1-2 teaspoons of Epsom salts per gallon of water until condition improves.
Any Chemical/Organic nutrients that have Sulfur in them will fix a Sulfur deficiency. (Only mixing at ½ strength when using chemical nutrients or it will cause nutrient burn!) Other sulfur nutrient supplements are: Rain water, Ammonium Thiosulfate, which is all fast absorption. Garden Sulfur, Sulfate of Potash, Gypsum.
Note: Caution when using gypsum to an already acid soil (pH that is less than 5.5) can have a very bad effect on different types of plants by affecting the absorption of soil aluminum, which is poison to plant roots.Now if you added to much chemical nutrients and or organics, (which is hard to burn your plants when using organics) you need to flush the soil with plain water. You need to use 2 times as much water as the size of the pot, for example: If you have a 5 gallon pot and need to flush it, you need to use 10 gallons of water to rinse out the soil good enough to get rid of excessive nutrients.
Pictures 1 shows a sulfur deficiency, notice how at the top part the yellow is starting from the backside of the leaf towards the front...

 Manganese (Mn)
 Micronutrient and Immobile Element
Manganese Helps enzymes break down for chlorophyll and photosynthesis production, as well as it works with plant enzymes to reduce nitrates before producing proteins.
Having plants that are deficient in manganese can turn the young leaves into spotted (mottled) yellow and or brown areas on young leaves. Dead (Necrotic) yellow spots form on top leaves, while the lower older leaves will or may have gray specks and or spots. Symptoms can include yellowing of leaves while the leaf veins can stay green. Can also produce a chequered effect. As the plant gets newer growths the plant will seem to grow away from the problem, that’s why the younger leaves may be unaffected. On the top of the leaves, brown spots can appear. While the severe areas of the leaves turn brown and wither. Parts Affected by a Manganese deficiency are: Young leaves.
Too much Manganese in the soil will cause an iron deficiency. The blotchy leaf tissue is caused by not enough chlorophyll synthesis. Your plants will seem to have very weak vigor caused by the excessive amount of manganese.
Problems with Manganese being locked out by pH troubles Soil pH of over 6.5, High iron soils, Low nitrogen Soils, Dry weather and compacted soil.
Soil Manganese gets locked out of soil growing at pH levels of 2.0-5.0
Manganese is absorbed best in soil at a pH level of 5.5-6.5 (Wouldn’t recommend having a soil pH of over 7.0 in soil) anything out of the ranges listed will contribute to a Manganese Deficiency.
Hydro and Soil less Mediums Manganese gets locked out of Hydro and Soil less Mediums at pH levels of 2.0-4.5
Manganese is absorbed best in Hydro and Soil less Mediums at pH levels of 5.0-5.6 (Wouldn’t recommend having a pH over 6.5 in hydro and soil less mediums.) Best range for hydro and soil less mediums is 5.0 to 6.0. Anything out of the ranges listed will contribute to a manganese deficiency.
Solution to fixing a Manganese deficiencyFoliar feed with any chemical fertilizer containing Mn., or mix with water and water your plants with it. Any Chemical/Organic nutrients that have Manganese in them will fix a Manganese deficiency. (Only mixing at ½ strength when using chemical nutrients or it will cause nutrient burn!) Other nutrients that have Manganese in them are: Manganese chelate, Manganese carbonate, Manganese chloride, Manganese dioxide, Manganese oxide, Manganese sulfate, which are all fast absorption. Garden Manure, Greenssand are both good sources of manganese and are medium/ slow absorption.
Now if you added to much chemical nutrients and or organics,( which is hard to burn your plants when using organics) You need to Flush the soil with plain water. You need to use 2 times as much water as the size of the pot, for example: If you have a 5 gallon pot and need to flush it, you need to use 10 gallons of water to rinse out the soil good enough to get rid of excessive nutrients.
Picture 1 shows a manganese deficiency in flowering.
 Boron (B)
 Micronutrient and Immobile element
Boron is important when dealing with maturation, pollen germination and seed production. As well as keeping calcium in soluble forms and keeping the stems, stalks, branches strong. Born keeps good color on the leaves and helps produce the plants structure. Boron also aids in cell division and protein formation.
Boron deficiencies will show up first in younger leaves (they may turn yellow), then moves up the plant. Boron deficiency can resemble calcium deficiency. Stunting, discolouration, possible death of the growing tips, bud abortion and development. The Roots will show a stunted with swollen short secondary roots, leaves distorted, sometimes bronzed or scorched. Tip of the shoot dies; stems and petioles are brittle. Boron deficiency plants are easy to tell, because of the spotting the leaves show like a strawberry mark and or splashes of the marking. Boron-deficiency symptoms first appear at the growing points. They also can show signs of newer growths turning gray and or dying, bud deformed, curling of the leaves which are often spotted and discolored. Newer growths appear to look like they are burnt. They can show signs of hollow stems along with yellowish to brownish color leaves. Dead (Necrotic) spots develop between leaf veins, as well as the leaves becoming thick. The leaves will wilt with necrotic and chlorotic spotting. Boron is poorly absorbed with low potassium content. First signs of the deficiency are abnormal growth tips. Having not enough boron can also invite troubles for fungus problems from the internal tissues to rot away, as well as the root hairs along with them being discolored. To avoid having a Boron deficiency try to keep the pH below 7 and to improve the moisture as well as retaining light soils.
Too much boron in your plants can produce a lot of problems. The leave tips turn yellow progressing inwards causing the plant to soon die slowly along with leaves dropping a lot.
Can show same signs as if a magnesium deficiency, but only happens on newer growths. Parts affected by a boron deficiency are: Growing points and young leaves.
Problems with Boron Being Locked out by pH troubles Soil pH under 5.5 or over 6.8, sandy soil, soil with low organic matter and or lack of nitrogen.
Soil Boron gets locked out of soil growing at pH levels of 2.0-5.0
Boron is absorbed best in soil at a pH level of 5.0-7.0 (Wouldn’t recommend having a soil pH of over 7.0 in soil) Anything out of the ranges listed will contribute to a Boron deficiency.
Hydro and Soil less Mediums Boron gets locked out of Hydro and Soil less Mediums at pH levels of 2.0-5.0
Boron is absorbed best in Hydro and Soil less Mediums at pH levels of 5.0-6.0(Wouldn’t recommend having a pH over 6.5 in hydro and soil less mediums.) Best range for hydro and soil less mediums is 5.0 to 6.0. Anything out of the ranges listed will contribute to a boron deficiency.
Solution to fixing a Boron deficiencyOne of the ways you can fix a boron deficiency is to either foliar spray or water regular. Treat with one teaspoon of Boric acid (sold as eyewash) per gallon of water. (Only mixing at ½ strength when using chemical nutrients or it will cause nutrient burn!) Other nutrients that have boron in them are: Borax, Boric Acid, Colemanite, Sodium pentaborate, Sodium tetraborate, which are ALL fast absorption. Garden Manure, Bone Meal are both good boron supplements, but are slow/medium absorption.
Now if you added to much chemical nutrients and or organics, (which is hard to burn your plants when using organics) you need to flush the soil with plain water. You need to use 2 times as much water as the size of the pot, for example: If you have a 5 gallon pot and need to flush it, you need to use 10 gallons of water to rinse out the soil good enough to get rid of excessive nutrients.
These pictures show a boron deficiency in different stages.

 Copper (Cu)
 Copper plays a big role in producing healthy plants, stems, branches and new growths, as well as for the plants reproduction and maturity.
It also assists in carbohydrate metabolism and oxygen reduction.
Copper deficiency plants shows a lack of growth, growth tips die back, green leaves will show a bluish hue and plants may have a hard time showing maturity in vegging stages. Copper deficient plants causes irregular growth and wilting in the newer growths. The Leaves at top will wilt easily along with bleaching (chlorosis) and necrotic areas in the leaves. Leaves on the top of the plant may show veinal chlorosis.(bleaching of the veins)
Growth and yield will be diminished along with spots on the leaves that are necrotic.
Too much copper in the system will cause the plant to die, as if it was a poison.Near death the plant will induce iron deficiencies and the root system will decay along with abnormal size of the roots, along with little side branching. Some new growths may not open up, along with becoming thin pale green to a bluish hue. Parts affected by copper deficiency are: new shoots, young leaves, and or the whole plant.
Problems with Copper being Locked out by pH TroublesHigh pH along with highly compacted soil that has a lack of nitrogen.
SoilCopper gets locked out of soil growing at pH levels of 2.0- 4.5
Copper is absorbed best in soil at a pH level of 5.0-7.5 (Wouldn’t recommend having a soil pH of over 7.0 in soil) anything out of the ranges listed will contribute to a Copper deficiency.
Hydro and Soil less Mediums Copper gets locked out of Hydro and Soil less Mediums at pH levels of 6.5-9.0
Copper is absorbed best in Hydro and Soil less Mediums at pH levels of 2.0-6.0 (Wouldn’t recommend having a pH over 6.5 in hydro and soil less mediums.) Best range for hydro and soil less mediums is 5.0 to 6.0. Anything out of the ranges listed will contribute to a copper deficiency.
Solution to fixing a Copper deficiencyOne way to treat a copper deficiency is by foliar feeding with Copper Sulphate, Cu sulfate, Cu chelates, Those 3 can also be used in soil. Any Chemical/Organic nutrients that have copper in them will fix a copper deficiency. (Only mixing at ½ strength when using chemical nutrients or it will cause nutrient burn!) Other nutrients that have copper in them are: Granular, Garden Manure, Greensand.
Now if you added to much chemical nutrients and or organics, (which is hard to burn your plants when using organics) you need to flush the soil with plain water. You need to use 2 times as much water as the size of the pot, for example: If you have a 5 gallon pot and need to flush it, you need to use 10 gallons of water to rinse out the soil good enough to get rid of excessive nutrients. Damaged leaves will NOT recover.
Picture 1 is a copper deficiency, (it may look like a over fertilization ( nitrogen) but look at the bottom of the leaves, notice how they are yellow and a bit of white, also some of the fan leave tips are brown and dying off.)
 Molybdenum (Mo)
 Molybdenum has proteins that help the plant take nitrogen from the air.
A Molybdenum deficiency causes leaves to have a pale, fringed and scorched look, along with weird or retarded leaf growth. Yellowing of middle leaves can occur as well as twisted younger leaves which will eventually die. Molybdenum deficiencies frequently resemble a nitrogen deficiency. A Molybdenum deficiency shows older chlorotic leaves with rolled margins and stunted growth. Looks like a nitrogen deficiency but with the red tips moving inwards to the middle of the leaves. Molybendum deficiency will usually show up in the older to middle aged leaves, then it moves to the young leaves. Generally a molybdenum deficiency occurs when sulfur and phosphorus are deficient.
Molybdenum toxicity doesn’t cause to many problems, but may cause problems when the human ingests it. Excessive molybdenum in cannabis will look like iron or copper deficiency. Parts affected are by the molybdenum deficiency are: Older leaves.
Problems with Molybdenum being Locked out by pH TroublesSoil pH that are under 5.5
SoilMolybdenum gets locked out of soil growing at pH levels of 2.0-6.5
Molybdenum is absorbed best in soil at a pH level of 7.0-9.5 (Wouldn’t recommend having a soil pH of over 7.0 in soil) anything out of the ranges listed will contribute to a Molybdenum deficiency.
Hydro and Soil less Mediums Molybdenum gets locked out of Hydro and Soil less Mediums at pH levels of 2.0-5.5
Molybdenum is absorbed best in Hydro and Soil less Mediums at pH levels of 6.0-8.0 (Wouldn’t recommend having a pH over 6.5 in hydro and soil less mediums.) Best range for hydro and soil less mediums is 5.0 to 6.0. Anything out of the ranges listed will contribute to a Molybdenum deficiency.
Solution to fixing a Molybdenum deficiencyOne way to fix a Molybdenum deficiency is to foliar spray with Molybdenum, like Miracle Grow All Purpose plant food and Miracle Grow: Tomato Plant Food. These can also be used to mix in with water as well. (Only mixing at ½ strength when using chemical nutrients, or it will cause nutrient burn!)Other nutrients that have Molybdenum in them are: I think Peters All Purpose Plant food does, as well as Greensand, Lime. Green sand and lime is slow/medium absorption, while Peters All Purpose Plant Food is fast absorption.
Now if you added to much chemical nutrients and or organics,( which is hard to burn your plants when using organics) You need to Flush the soil with plain water. You need to use 2 times as much water as the size of the pot, for example: If you have a 5 gallon pot and need to flush it, you need to use 10 gallons of water to rinse out the soil good enough to get rid of excessive nutrients.
Picture 1 and 2 is a Molybdenum deficiency in late flowering

 Nickel (Ni)
Nickel is required by plants for proper seed germination
Though Ni deficiency symptoms are not well documented. Symptoms include chlorosis and interveinal chlorosis in young leaves that that goes down to plant tissue necrosis. Other things are poor seed germination and decreases in crop yield.
TerminologyChlorosisyellowing of the leaf tissue.
Interveinal ChlorosisYellowing in between leaf veins, veins themselves remaining green.
NecrosisThe plant tissue browns and dies. The tissue which has already died on a still living plant is called necrotic tissue.
Sick plants that are from bug infestation, pH problems and over watering/under wateringOver wateringOver watering is one of the biggest mistakes new growers make, reason for this is, because they feel the need to give there plant everything and will overdue a lot of things and one of them is over watering. By over watering your plant you soak the roots so much, they can’t get enough oxygen and slowly die. The plant shows signs of over watering by: Wilting, droopy look, yellow and or dead leaves falling off, which includes leaves that don’t look dead falling off. One of the best ways to tell how NOT to over water is by, picking up the pot when it is dry and then picking up the pot after you water. (This is a reason why it’s smart to use light pots.) When you water, you want to water just enough to where you see a bit of water coming out of the bottom, not gushing or pouring out. Just enough to see a little bit, then you know the plant has enough water. To prevent over watering you can either: add more perlite to your soil, add hydrogen peroxide to your water for extra oxygen, all the while killing bacteria if any in the soil. After watering, wait a few days to water. Mj plants like a good watering and then a couple days to dry out in between watering. So it’s very easy to over water. Besides the weight of the pot, another way to test if your plant needs water is to stick your index finger a couple inches into the soil. If the soil at the tip of your finger feels almost dry, then it's time to water again. The top of the soil should be allowed to dry out between waterings if it's still moist the plant does NOT need watered. You can also use a moisture meter which will tell you the level of moisture down in the soil. You can buy them at most garden supplies or hydro shops.
Here is a picture of what over watering looks like:
 Under Watering
 Under watering can show the exact same symptoms as over watering can, they show the droopiness along with the top soil being hard. To avoid this make sure every other other watering you give your plants a good watering, like use a bit more water then you normally do, because sometimes your plants will need a good quenching once in a while. So doing this will help the bottom roots and root hairs get enough water to produce newer growth. For new growers they tend to do both over watering and under watering.
More over watering then anything else, they tend to be to "generous", and then you have ones that are to afraid to water them to much and then they get the under watering symptom. Under watering seems to droop more than over watering does, the fan leaves will droop closer to the stalk and won't be as yellow as over watering looks like, under watering looks like this picture below, only way to stop under watering is to water when the pot feels lite. Make sure few drips of water come out at the bottom of the holes, that way you know the plant has enough water.
 Root Rot
What causes root rot? Low Oxygen levels. (DO) Desolved Oxigen. Temp's are the main reason for root rot, Low temps will lower the DO levels and high temps will cause low DO levels. Keeping temps between 65 to 82 will allow MAX DO levels or max o2 for roots. (Thank you so much for the information syko2! has provided above!)
Over watering also causes root rot, Root Rot infects parts of the roots, which then spread infecting the whole roots causing death, Root Rot can be caused by to high of temps in hydro as well as over watering. Not enough drainage in your soil can cause Root Rot, even signs of it looking over watered, because the soil holds moisture to long for the roots to dry out. So these 3 things are all connected together. The main one that causes everything is over watering. Once you find out you have root rot, depending on how bad the problem is, you can add H202( Hydrogen Peroxide) with your water or hydro setup to kill the bacteria caused from root rot. If the plant is severely taken over by it, there are only a few things you can do, cut off the roots affected by it depending on if its hair roots or tap roots, add H202, or just chop the plant. To prevent Root Rot, adding product's like Thrive Alive B-1, See Weed, Super thrive will help protect your plant's from root rot and will help cure root problems. (Again ty so much for giving me the info syko2!!!)
Here is what root rot looks like: 4eBig thanks goes out to buzz, diggerdigzit and Shop Vac! Thanks for the pictures guys!
First picture is of to high temps in the bubbler: Last 2 pictures came from chemical burn root rot first picture, moldy rock wool with root rot.


 pH Problems
 One of the first signs of having a slight pH problem is, your plant having part of the leaves kind of twisty, spotty with brown, yellowish, red spots within each other.
Sometimes they don’t have to have all the colors, they could just be spots that have yellowish brown, or just reddish brown and can happen anywhere on the plant. Mainly starts on big fan leaves then goes to little leaves.
When this happens you need to check your soil pH, water pH before and after adding your nutrients. One of the biggest causes is adding nutrients like earth juice; they take the pH down quite a bit. Also can happen when you add bone and blood meal to your soil, that will throw the pH off as well, so it’s smart to test the mix before putting your plants into the mix. After the spots happen you will soon see nutrients being locked out, when that happens
DO NOT ADD ANYTHING TO FIX THE PROBLEM UNTIL YOU GET YOUR pH FIXED!! Reason why is, because the plant isn’t absorbing that nutrient, by adding the nutrient it is deficient in, you are causing it to have a build up in the soil therefore can cause that nutrient to become toxic to the plant, because of buildup, to much buildup of certain nutrients will lock out other nutrients. In order to fix the problem you will need to first fix the pH and then if the soil is deficient in nutrients you can add it to fix the problem. A digital pH tester is the best tester to use as they are the most accurate. If you can’t afford a digital pH meter, then your best bet is to get pH testing papers. DO NOT get soil testers, those are the cheapest junk I ever seen and do not give good readings, so you cant rely on one of those. There are a lot of good pH testers out there, one of them is hanna. That is the one I use and is the best money ever spent! Vast majority of problems with soil pH comes from the soil if it has additives like peat moss, which is HILGY acidic..... and or the water you are using, as well as nutrient deficiencies from using the wrong pH for watering. You want to be careful when adjusting your pH, doing this over a week is the best idea, to fast will cause shock to the plant. If you can’t get a hold of a pH tester or pH test papers. If you have some dolomite lime, its always better to use it in soil rather than every time you water, imo and from others (Uncle Ben) That it really doesn’t stabilize as many people think it does, Soil pH and micronutrient availability are interrelated. Don’t Use to much lime to decrease the soil pH to a point where micronutrients can't be unavailable to plants. The micronutrients affected by pH include iron, manganese, zinc and, not as often copper. The problems when you apply to much lime can make it harder to correct your pH than what you would have when you didn’t add as much lime. You can always add more lime, but if you add to much you can’t remove it if you put to much lime in the soil. With great soil moisture, lime will work immediately and pH will start to change over a few months. However, it can take up to a year for the real benefit of lime to work. As the soil pH rises, the time it takes for lime to react decreases due to lower levels of soil acids. If you need to change your pH when its to high, if you choose to use lime it will not help as much as you think in lowering your pH, it would need alot of lime to lower your pH to a point where it would cause a toxcicity to the plants so look else where to use something to lower your pH rather than using lime.
So here at the bottom is a list of some buffers that are good to go with when raising and lowering pH!
Here are some pH buffers when your pH is too high: Use these SOIL pH Adjustments to lower your pH: sawdust, composted leaves, wood chips, cottonseed meal, leaf mold and peat moss. Sawdust, composted leaves, woodchips and, lemon juice, pH DOWN.Hydro pH Adjustments: pH Down (vinegar and lemon juices are good for soil, but not recommended for hydro use) Thanks goes out to syko2 for that one! (Only quality pH buffers should be used to adjust pH and be sure the buffer and nutrient work's well together.) Here are some that will raise the pH: use these SOIL Adjustments when your pH is to low: pH UP, dolomite lime, hardwood ash, bone meal, crushed marble, or crushed oyster shells, potassium hydroxide <--- Thank you Uncle Ben!Hydro Adjustments: pH UP, sodium bicarbonate or lime.(Only quality pH buffers should be used to adjust pH and be sure the buffer and nutrient work's well together.)Here are a few pictures of pH spotting before nutrient lockout occurs. The last picture is shown is high pH with the twisty leaves. Note the edges are brown, this is a potassium deficiency that is caused by pH lockout.(Sometimes this gets confused with a nitrogen toxicity, so always keep your pH in check and test it often!)

Props goes to Chemical Burn For the Picture!
 Bud Rot
During the last week or two of flowering, depending on if you use chemical or organics. If you use chemical, you want to flush 1 ½ weeks to 2 weeks before harvest to flush out all of the chemical nutrients that your plant was using. If you are using Organics then you would want to flush about a week before harvest. Giving them plain water is fine, flushing them also improves the overall quality of your bud. Once you start to 'flush' you should check extra careful for bud rot. Bud Rot Happens when the humidity is high, if you have fat dense buds, or if mold spores are in the air. Bud rot looks like a black brownish sludge that can quickly take over your plant and ruin your harvest. The mold spores are air-borne.
Prevent and ControlRemoving any dead or dying material from the plant helps prevent bud rot so does decreasing humidity and increasing ventilation. There are also safe anti fungal sprays from hydro shops that help. If you do find gray mould, cut off the infected part of the plant well above and below the effected area and remove it from the grow room. Decreasing the humidity from 55% to around 40% will make a big difference in preventing bud mold. Also having very big buds can cause bud rot, and would advise watching the areas on your plant that have the biggest, thickest and the more dense buds. Try to have medium size buds rather than having big thick buds. Having a dehumidify around when high humidity days can help as well.
To protect them against bud rot for outside. DO NOT foliar spary at night, doing this the heat will not evaporate the water as well because it is night.
Water the plants in the day instead of so close to being night. Same as foliar spraying.
Make sure your plants are stress free as possible and checking plants often can aid in getting rid of moldy bud before the spores spread onto other areas of the plant! Have a lot of air going around the plants for bad ventilation= sick plants and a breeding ground for spores!
Keep leaves away from soil making sure they do NOT touch the soil.
Keep cooler temps at night while plants are on there down time.
If you have gotten bud rot already the best thing to do is cut off the bad buds discard them away from you’re grow and apply any of the following: Neem oil, Neem2 which is a ready made solution!
Using high pH water for foliar spray prevents them from spreading as well kills the mold. pythium is another good product to use! There are many other chemicals and organics that work, but these are the most popular and they work very very well!
FungusFungus is another problem when you are in flowering, because they are susceptible to a fungus or bud rot. Growing conditions for fungus are best when temps are between 60 and 80 degrees and the humidity is high. The fungus is very destructive and spreads quickly. These kinds of fungus are air borne and can travel to other bud sites. If you already have been infected by them the best thing you can do is cut off and remove the infected area and then discard out of the grow area, then get a hold of some anti-fungal spray and apply.
Fungi can kill your crop quick, so invest in some SAFE fungicide and spray down the plants as much as you can and as soon as you can. The faster the safer.. If you have had problems with fungus before, do NOT spray them you will contribute to the fungus becoming resistant to the spray/chemicals you are using. Try to keep the humidity down to the range fungus do not grow to well in. Keep a good amount of ventilation around your grow, and if you have plants outside, always keep them quarantined away you’re your indoor plants until you know they are safe.
Most fungicides are very nasty and eating them can be very dangerous so its best to use something on them that is safe on plants that you can eat., Safer makes a very safe product that can be found in most stores and hydro shops. it contains only sulfur in solution. Here is a picture of what bud rot looks like when it starts to form.
ControlTo control to prevent fungus from forming there are a few things you should do.
DO NOT foliar feed at night, tends to make humidity higher rather than when you water in the day the water has time to evaporate where at night will linger in the air.
Same goes for watering plants at night, wait till the morning or afternoon to water!
Keep a happy plant and will not become prone to infections. Checking plants often can aid in getting rid of any fungus that may attack other leaves and or bud!
Have a lot of air going around the plants for bad ventilation= sick plants and a breeding ground for spores!
Keep leaves away from soil making sure they do NOT touch the soil.
Keep cooler temps at night while plants are on there down time.
If you have already gotten some kind of fungus there are things you can use: neem2, neem oil works wonders!! Potassium Bicarbonate, Baking soda and for other chemical agents you can use Plant Shield, Serenade and pythium! There are many other chemicals and organics that work but these are the most popular and they work very very well!
BIG THANKS goes out to Bud63 for letting me use the pictures!!

 Pest Troubles
Well this isn’t going to be a long one, just going to talk about what each bug does, what are its symptoms and how to prevent and kill them.
White flys:They look just like tiny months, and lay eggs on leaves and or top of the soil. They are a pest in big numbers and are not very hard to get rid of, they can cause damage by sucking sap from the plants. Here are some ways NOT to get them: Do not overwater your potted plants. Allow the soil to dry between waterings and provide good drainage. Another one is to put sticky traps up when you think you may have them, that way when they get stuck you can identify them.
if you already have white flys, you can use insecticidal soap, this will help stop them from flying so it wont infect other plants.
It also stops them from laying new eggs. If you use the soap reapply weekly.
If insecticidal soap does not work too well, there is some other options that are stronger called PERMETHRIN dust, Which can be used during flowering and is safe on ediable plants.
Here are some other good things to use to rid of white flies: PERMETHRIN and biffen (both are safe to use on ediable plants),
Spreader sticker (which allows to apply the spray to a wider area)
Nylar (works well for inhibiting there growth and development)ORTHENE FOGGERS works well for a small area and are safe on the plants.Other products you can try are:
Chemicals
Hot Pepper Wax, Safer Yard & Garden Insecticide (which can be used right to the day of harvest), GNATROL (used in hydro in the water as well as soil), Doc's Neem Pest Soap, Safer Sticky Stakes,TR-11000 Pyrethrum.
SymphilidsSmall pests that are tan to white colored and look like centipedes. They are very deadly to the plants, because they burrow down into the roots and damage them by feeding of them. Your plants leaves will begin to die off. They are found mostly in soil composites that have not been cleaned, like soil that has additives in them such as animal manure.
(I know it will smell funny but sterilizing the soil in the oven for 30 min can kill any pests in the soil, heat to 350 for 30 min.) They are easy to tell if you have them, because they come to the top soil when your plant is being watered, if you find you do have them, use Fungus Gnat Killer (“B.T." a non chemical,biological control) in the powdered form. One application should kill it, just to be safe repeat every 7 days to kill off the larvae. Tobacco juice kills them as well! And nematodes.
Picture 2 shows the Symphilids look like..

Fungus GnatsFungus gnats like to feed on roots of the plants and organic matter. Adults and larvae live in moist, shady areas. The adults lay there eggs on top of the soil, near the base of the stem and takes about 4 days to hatch. The larvae will start by eating the root hairs of the plant then working their way up the plant, Fungus gnats like to eat organic matter so they will be stealing away nutrients from your plants, so its best to get rid of them completely.
If plants are outdoors, check the soil of plants before taking them back indoors for adult gnats or their larvae.
Prevent indoor entry of gnats by making sure there is no open windows open without screens on. Aug is a bad time for them as they are worst that time of the year.
Put sticky traps on the soil surface to trap the gnats
Put potato slices on the surface of the soil. The larvae like it and will be drawn to it.. After about 4 to 5 days, remove the potato slices with the larvae. To get rid of them you can do a lot of things like either use a NO pest strip, neem oil or putting sand on the surface of the soil will suffocate the eggs and get rid of them as well. Tobacco juice kills them, and works well for re-occurrences!
They can be in or on the soil and can fly. In order to get rid of them you can use neem oil, sand on the surface again kills them, and no pest strips catch the ones that fly. A chemical product called Zone works very well and is very powerful and works well in hydro!
Other Products which can be used in hydro and soil are:
Chemicals
Hot Pepper Wax, Safer Yard & Garden Insecticide (which can be used right to the day of harvest), GNATROL (used in hydro in the water as well as soil), Doc's Neem Pest Soap, Safer Sticky Stakes,TR-11000 Pyrethrum.
Picture 4 shows the fungus gnat.

Picture 5 shows there larvae
 Spider mites:
Spider mites are by far the worst pest to have, because they are the hardest to kill and can literally kill any plant. They are by far more active in warmer climates than cold ones, they also suck sup from the leaves leaving tiny white spots on the leaves from where they suck on. The damage they do is just like thrips, but with spider mites they pierce the surface of the leaves and can show tiny holesor white speckling damage, unlike with thirps they eat the surface of the chlorophyll. You can tell when you have infestation of spider mites , because you will have distorted growth, shortened internodes and petioles.
When you have bad infestation you will see webbing with larva in them. You get spider mites from either store bought soil mostly when your soil is not sterilized. Most brands do not state weather or not they are, chances are if you buy cheap soil, you have a less likely chance of the soil being sterile.Also, bringing outdoor plants indoors, or getting plants from someone else who was infected with spidermites.
Spider mites live on the plant itself and are under the leaves most of the time and are usually are so tiny you can’t see them with the naked eye. In order to get rid of spider mites one of the best ways to start to get rid of them is to use NO-Pest strips.NO-Pest strips work well and should always be used with other methods. Neem oil helps get rid of them as well. Also by raising the humidity in your grow room a lot will kill the spider mites off, by them absorbing to much humidity and will burst. You can use soap solution like Safer Insecticidal Soap to get rid of most aphid problems. Use some tabacco juice and chili pepper powder added to this for mites. (see below how to make tabacco juice)
Pyrethrum should only be used in extreme circumstances directly on plants, It starts to breaks down around a week and is easily washed away with clear water or. If your plants are in flowering and you have spider mites, using safer chemicals is your best bet. The tobacco and pepper soap solution works well and should be used daily, spraying on the underside and top leaves and later the whole plant. Since spider mites are very residual to common products, you have to find or try any number of ones untill you get rid of them. make absolutly sure you retreat as stated, other wise you will get resistant spidermites and then you have a bigger battle on your hands.Also do not allow pets that go outside alot to be around indoor plants,mites have been known to be carried in from pets to plants. PLEASE NOTE, below are ways to get rid of spider mites, but no 2 mite infestations are identical, you almost always have to use different products to get rid of them, also make a habit to check for at least a whole month after thinking you got rid of them, that way your chances of the spider mites that became resistant breeding and then having a bigger problem. Make sure you spray your plant down very good and enough and on time.
Here are some more products that may help get rid of spider mites:
Chemicals
Hot Pepper Wax, Safer Yard & Garden Insecticide (which can be used right to the day of harvest), GNATROL (used in hydro in the water as well as soil), Doc's Neem Pest Soap, Safer Sticky Stakes,TR-11000 Pyrethrum. Anything that says dicofol on the back. (should be used in vegging or early flowering)
Tabacco Juice recipe
Take 3 strong ciggeretes soak them over night in water
Boil it for 2 to 3 miniutes, let it cool off and spray the plants 3 to 4 times a week. You can add safer soap if you like to the mixture.
(make absolutly sure you use gloves/face protection while handling and spraying)
Neem oil works very well too!!
Your Last resort is to use Avid.
Pictures 5 shows spider mites and there larva. Picture 6 shows spider mite damage. Picture 7 shows SPidermites larvae and spidermites closeup


 Thrips
Thrips are really tiny, but can be seen by the naked eye. Some may have wings and some may not. Thrips reproduce rapidly, especially in tight places. That is what makes them hard to get rid of when using pesticides. The suck the sap right out of your plant with there piercing mouths, which makes the leaves look like they turned white. You can tell when you have thrips by taking a look at your leaves, the leaves will look as if there chlorophyll have been ripped right off the plant. Plants that are damaged can’t be healed thus making it harder for the plant to absorb light. SO if left untreated the thrips will kill the plants. Damage also can be seen by the greenish black specks of there poop they leave on leaves. Also the plants will show silver patchs from scar tissue. Depending on the severity at first, thrip damage might look like spider mite damage untill it increases in damage and then thrips case is for sure when you see the greenness replace with big parts of white.
One good way to repel thrips for those growing outside is to use garlic, this is a good way to keep them away before you get them. The color yellow attracts the thrips and should be advised not to have this color around your grow.. If you already have them using neem oil, and or lady bugs can get rid of them. If the infestation is bad then you need to use biological solution like, pyrethrin-like insecticides. Picture 8 shows thrips damage.
Other Products include:
Chemicals
Hot Pepper Wax, Safer Yard & Garden Insecticide (which can be used right to the day of harvest), GNATROL( used in hydro in the water as well as soil), Doc's Neem Pest Soap, Safer Sticky Stakes,TR-11000 Pyrethrum.
Picture 1 is Thrip damage

Picture 2 is Thrip Larvae
 Caterpillars
 (cutworms, cabbageworms, etc.)
chewed leaves. Damage: Most caterpillars feed on plants of some kind, they can feed on wool and hair (the clothes moth) Some are pests in gardens and yards. The leaf roller caterpillars can cause some severe damage of trees and shrubs, while others, such as cabbage loopers, and cutworms can cause severe damage to gardens.
If you find caterpillars have been eating at your plants,garden and you need to get rid of them are several non-toxic and least toxic methods to choose from.
ControlsHand picking: Easit way to controll them is to pick them up and knock them into a bucket of soapy. If you are scared about handling caterpillars, you can use some gloves or have someone else pick them up for you.
Chemical:
BTK in dust form can be used to kill caterpillars. BTK can also be used to foliar spray your plants. One tablespoon of neem oil added to your BT mix helps stick the mix to the plants better when you are foliar spraying.. BTK is available in liquid form. Apply BTK on all of the leaves both top and underside If you decided using the dust kind,spray your plants down with water before you apply the dust Apply every week to 2 weeks and or after it rains. The caterpillars must eat the BT as they are feeding on foliage in order for the caterpillars to be rid of.
Organic ways:
Insecticidal soaps, neem, oil, and spinosad are the safest insecticides that can be used to control.. Soaps and neem are non-toxic and are great to use when you have a lot of pets and want to be friendly to nature and its animals. Spinosad works very very good in controlling the caterpillar population and is non toxic to wild-life, pets, and humans. It hardly has any impact at all on the plants.
Picture 1 shows damage from caterpillars.
 Slugs and snails (Outdoor Growers)
Both slugs and snails travel by secreting a mucus or slime on which they glide. When you see the slime trail on your plants and have damage, then it was most likely caused by slugs or snails.When your garden is very moist slugs and snails can live for a long time as this is the key to them living a long time. If you keep your garden not as moist and dark slugs and snails cannot live as long. They stay away from the sunlight along with hiding around moist dark areas in the garden.They also hide in Mulches, short stubby plants, boards, and in the soil. They come out mostly at night and on cloudy days. They feed by chewing holes into your leaves and can clip the edges of leaves and flowers.Slugs and Snails are mostly pests of seedlings and herbaceous plants that are close to the ground. In order to confirm the damage was caused by slugs or snails, look for a silvery trail of mucous.
ControlsSnails can cause massive damage to gardens if given a chance. It is very unlikely you will be able to completely rid your garden of them, but try to keep the numbers down as much as possible to keep healthy and undamaged plants. Here are some ways to control slugs and snails.
Reduce slug and snail damage dramatically by watering in the morning instead of the evening.
If you do see any slugs or snails avoid putting mulches and dark hiding cover.Oak leaf mulch will deter slugs and snails.
Handpick slugs and snails at night. Use a bucket to put them into soapy water.
Lay boards down in the garden to trap slugs and snails.
Diatomaceous earth sprinkled around you’re your plants base of the stems will help keep out slugs and snails, but it can also stop other beneficial insects.
Soak the soil with wormwood tea.
Put copper wire around your garden or at the base of your.Slugs get a big shock when they touch copper Just make sure you don’t trap them inside your garden when you put copper around your garden.
Beer is good to use, because slugs love beer!. Take a container of beer and bury it in your garden with it just barly above the ground so they can drink it and drown.
And one of our favorite additives.... SALT!
Predators that like to eat snails include: snakes, toads, frogs,fireflies, predatory snails, birds, beetles. The large, black iridescent beetles you see in your yard are predators. Firefly larvae eat on slugs and snails and can literally wipe out the development of them by eating 40 to 60 snails from just 1 larve of a firefly!!
Please be kind to nature and pets and stay away from poison slug bates. If you have seen what it can do to pets you wouldn’t want to ever use it again!!!
Poisonous baits are hazardous to all living beings and animals. Slugs and snails can become resistant to baits. So its better to use other methods and stay away from chemical baits, all the while protecting nature.
Leaf miners These Little creatures are a pain to get rid of, the miners eat and dig squiggly lines into your leaves all the while planting there larvae in them making it hard to get rid of them. They plant there eggs in the leaves in mid When they hatch they feed off of your leaves untill they get big enough to pupate. Pupation occurs within the leaf or in the soil beneath the plant. After they emerge the entire cycle will start over and you will have a bigger infestation.
ControlsControls: Natural control for these insects is difficult. You can remove affected leaves and discard them. Chemical control is hard and is ment towards the emerging adults. Since the larvae is well protected within the leaf. Neem oil will work well.
Pictures 3-4 shows leaf miners attack

 Scale (Outdoor Problem)
Scale can be found on stems, underside of branches, trunks, young trees or shrubs. They usually emerge from there eggs around March to Aug and make there homes on the plant. They pierce the cells and feed on the sap of the plant. After they have a place on your plant they develop a very hard shell which protects them from other preadatory insects and chemical compounds to get rid of them. After they develop this hard back the secreation they drip attracts ants. Now since the ants travel over the scales thus dragging it all over your plant spreading the scale from one place to another on the plants. When the secreation falls on leaves it can make a type of mold called
Sooty Mold which makes the leaves look dirty and black.
Sooty MOLD
The problem with this type of fungi is that it attracts several types of sucking insects,like Aphids, Mealy Bugs, Thrips, and Whiteflies... This mold is so dark that it affects the plant by inhibiting the light from reaching its leaves which stops photosynthesis, which in turn makes the plant die.
Control The waxy layer that is on scales protects them from insects and other pesticides. In order to get rid of them Use a horticultural oil to kill the adult populations throughout the year. If you can combine the oil with the insecticide, such as, Orthene, Sevin, or malathion it can almost wipe out the scale population along with the sooty mold it causes!Neem soil works very well too!
You can do a few things.. more if your not nearing the end of harvest..
1) take a pack of chewing tobacco, mix it with a gallon of water, let it brew for a day.. spray the plants down as needed.. if your a cigarette smoker no worries spray em down till harvest.. watch for mold..
2) take some safers natural soap, mix it with some water so its a soapy slippery mixture, soak em down.. the idea is to suffocate the bugs in the soapy bubbles...
Miscellaneous Sick Plant Troubles This picture is caused by temperature changing from cold to warm, cold nights and warm days. Some varieties, like equatorial sativas, don't take well to cold weather. If you can keep the roots warmer, the plant will be able to take cooler temps than it otherwise could.
 This picture is what light bleaching/light burn looks like.
 Only way to fix this is to Move the lights away from the plant!
Or make sure you don't go over 75 watts a sq foot, or your plant will have to much light and light bleaching can occur anywhere on the plant. (Indica species seem to bleach easier than Sativas.)
 These pictures is what heat stress looks like.
 Only way to fix this is to Move the lights away from the plant!
And get better ventalation, and or add more fans! Heat - If the lights are too close to the plant, the tops may be curled, dry, and look burnt, mimicking a nutrient problem. Your hand should not feel hot after a minute when you hold it at the top of the plants.

 This is the most common and loved nutrient burn
Ahh, nutrient burn! Stop this by not adding to much chemical/organic nutrients to your water,foliar feeding. DONT feed more than 1 time a week, use 1/4 strength for first feeding and then go up to 1/2 strength from then on when using chemical nutrients. Its very easy to overdo it. Causes leaf tips to appear yellow or burnt. To correct soil should be flushed with three gallons of water per one gallon of soil. NEVER give nutrients to plants that are under 2 weeks of age, at this age the soil nutrients are enough to suppliment them untill 2 weeks of age or more depending on how good your soil is. Using ferts before 2 weeks will almost likley kill your plants.
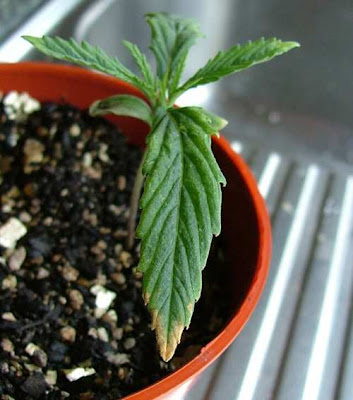
 Stem Problems
Stem Breakage - Everyone from time to time has had this problem or will. This is when your stem is broken. Stem breaks can come from a number of things: training, dropping something on it, animals, weather. No matter how it happened the most important thing is to not panic.
Solution - Fixing this is not really a problem. Splint it with something and tape it in place. Marijuana has a great ability to come back even after a stem break. Give her a week or so to recover before she will start to grow again. And be more careful next time!
Misc things to know!!When your humidity is low your leaves can become shriveled. Using humidity around 40-60% is fine for vegging and flowering.
If your plants are stretching than it can be caused by a few things. Not enough light, Light not close enough, or it’s the wrong kind of light. Stay away from incadesant bulbs they produce more heat than good. Same goes for halogens, they are worthless and cause more heat than anything else. Instead get a HPS, MH, Fluros or some compact fluros!
Hps will keep your plant short and stubby while cool fluros will keep your plant bushy, while soft white will keep your plant tall, Having a mixture will have a tal and bushy plant! Nothing wrong with having mixed spectrums!
Or just go grow outside and save energy!!
When unrooted clones start to yellow it means they are either not touching the rooting medium good enough, to much co2, or the light is to far away. Plain tap water that is pH adjusted is just fine till the clones have rooted. Giving any ferts will kill them untill they have been rooted.
PPM = parts per million
EC = electric conductivaty
TDS = total desolved solids
(information provided by syko2)
If you are running in hydro its good to change your water every 2 weeks to keep out bacteria growth and to keep your plants with a good supply of fresh water.
A good rule to go by for how much PPM each part of your plants growth has is as follows:
Seedlings should be around 50-150 PPM
Unrooted clones to be around 100-350 PPM
small plants to be around 400-800 PPM
large plants to be around 900-1800 PPM
Last week of flowering use plain water.
If you see dark or patchy spots on your leaves, that could mean you have mold. Check fordark patchy areas on the leaves and if you do have mold, lower the humidity and get a better ventilation setup going to prevent further occurrences.
And most important.. KEEP YOUR GARDEN CLEAN!!!
I hope you have enjoyed this guide and hopefully it has helped you out or someone else has been helped by it.
Stay Safe and God bless!


